Table of contents
As more and more developers turn to Docker to streamline their development processes, it becomes increasingly important to understand how to take backup and restore a volume in Docker. In this article, we'll explore the pain areas around volume backup and restoration, the reasons for doing it, and provide a comprehensive solution that will help you take backup and restore volumes with ease.
What?
Docker has become an essential tool for many developers in recent years, allowing them to create and manage containerized applications with ease. One of the most significant advantages of Docker is its ability to manage data volumes, allowing you to store data that persists beyond the lifetime of a container.
However, even with its many benefits, Docker's volume management can sometimes be challenging. In particular, taking backups and restoring volumes can be a complex and error-prone process. In this article, we'll explore why you might need to take backups of your volumes and how to do it correctly.
Why?
There are many compelling reasons to do so. Here are a few reasons why you might need to take backups of your Docker volumes:
Disaster Recovery
The most obvious reason to take backups of your Docker volumes is to protect against data loss in the event of a disaster. By taking regular backups of your volumes, you can ensure that your critical data is safe and recoverable in case of an emergency.
Testing and Development
Another reason to take backups of your Docker volumes is for testing and development purposes. By creating backups of your volumes at different stages of the development process, you can easily roll back to a previous state if you encounter problems or need to test new features.
Replication
Taking backups of your Docker volumes can also be useful for replicating data across multiple environments. By creating backups of your volumes and restoring them in other environments, you can ensure that your data is consistent across all of your development, staging, and production environments.
How?
Now that we've explored the pain areas and reasons for taking backups and restoring volumes in Docker, let's take a look at how to do it correctly. Here are the steps you should follow to take backups of your volumes:
Step 1: Identify the Volume
The first step in taking a backup of a volume is to identify the volume that you want to back up. You can do this by running the following command:
docker volume ls
This will show you a list of all the volumes that are currently available on your Docker host. Note down the name of the volume that you want to back up.
Step 2: Create a Backup
To create a backup of the volume, you can use the docker run command to start a container that mounts the volume you want to back up and a separate container that writes the backup data to a file.
Here's an example of how to do this:
docker run --rm \
--mount source=<volume-name>,target=<target> \
-v $(pwd):/backup \
busybox \
tar -czvf /backup/<backup-filename>.tar.gz <target>
In this command, replace <volume-name> with the name of the volume you want to back up, <target> with the mount point inside the docker container, and <backup-filename> with a name for the backup file.
Step 3: Move the Backup File to an External Server
After you have created a backup file, it's a good idea to move it to an external server or storage device to ensure that it's safe and secure. Storing the backup file on a separate server or storage device can help to protect it in the event of a disaster, such as a server failure or a security breach.
To move the backup file to an external server, you can use SCP.
SCP: Secure Copy (SCP) is a secure file transfer protocol that allows you to transfer files between servers using SSH. To use SCP, you will need to have SSH access to both the source and destination servers. You can use the following command to copy the backup file to the external server:
scp /path/to/backupfile user@external-server:/path/to/destination
Step 4: Restore the Volume
If you need to restore the volume from the backup, you can use the docker run command to start a container that mounts the backup file and a separate container that writes the backup data to the volume.
Here's an example of how to do this:
docker run --rm \
--mount source=<volume-name>,target=<target> \
-v $(pwd):/backup \
busybox \
tar -xzvf /backup/<backup-filename>.tar.gz -C /
In this command, replace <volume-name> with the name of the volume you want to back up, <target> with the mount point inside the docker container, and <backup-filename> with a name for the backup file.
Example
For the purpose of this blog, we will be setting up a basic Docker environment for MongoDB, along with an Express application to visualize the data.
Setup MongoDB Docker
Create a docker-compose.yml file.
You can use the below example to setup MongoDB docker:
# Use root/example as user/password credentials
version: '3.1'

services:

  mongo:
    image: mongo
    container_name: mongo
    restart: always
    environment:
      MONGO_INITDB_ROOT_USERNAME: root
      MONGO_INITDB_ROOT_PASSWORD: example
    volumes:
      - mongodb:/data/db

  mongo-express:
    image: mongo-express
    container_name: mongo-express
    restart: always
    ports:
      - 8081:8081
    environment:
      ME_CONFIG_MONGODB_ADMINUSERNAME: root
      ME_CONFIG_MONGODB_ADMINPASSWORD: example
      ME_CONFIG_MONGODB_URL: mongodb://root:example@mongo:27017/

volumes:
  mongodb: ~
In the above example, I added a named volume mongodb. Here we have configured docker to persist its data to a volume.
docker-compose up
To check the running docker containers you can use the below command.
docker ps
You should see 2 docker containers running i.e. mongo and mongo-express.
CONTAINER ID   IMAGE           COMMAND                  CREATED          STATUS          PORTS                                       NAMES
5f68eaf8184a   mongo-express   "tini -- /docker-ent…"   11 seconds ago   Up 9 seconds    0.0.0.0:8081->8081/tcp, :::8081->8081/tcp   mongo-express
6789cf1e7bed   mongo           "docker-entrypoint.s…"   11 seconds ago   Up 10 seconds   27017/tcp                                   mongo
You can also view the volume which you created using the following command.
docker volume ls
For me the output looks like this
DRIVER    VOLUME NAME
local     82fd19dfc5dc839a51b2afd59614474038cd0ce8b494739d883d9b503cd0c61e
local     32582d9a00557c9229418062e6308515c4c4c7eb0bb14a8c43203cafffb675c5
local     docker-test_mongodb
The volume name docker-test_mongodb was automatically created when I placed my docker-composer.yml file inside the docker-test folder. This is the location where all of our MongoDB data will be stored.
Modify MongoDB Data
To confirm that we have successfully restored the database from the volume, we need to make a minor modification to the database.
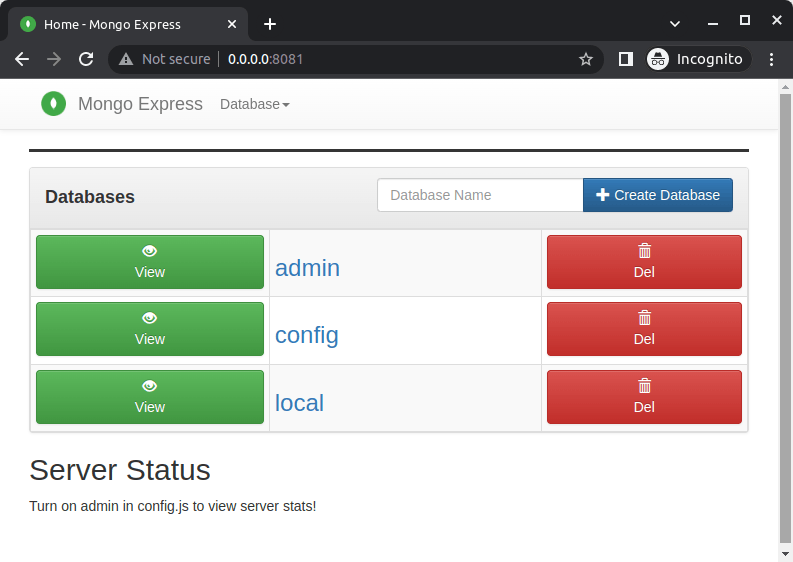
Visit 0.0.0.0:8081 where the Mongo Express is running.

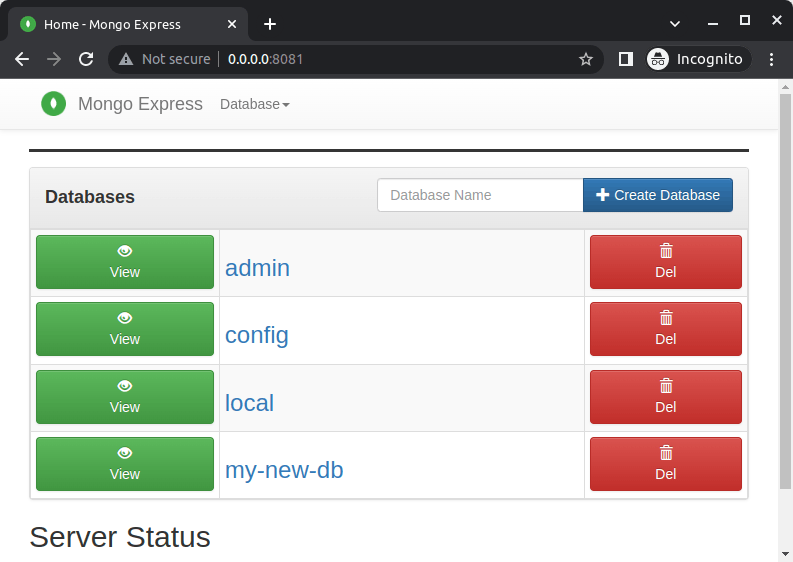
Create a new database here. I created my-new-db as the new database.

So now we need to ensure that this new database that is created is also restored.
Take Backup
Let's take the backup of the volume now.
Please run the following command to take the backup.
  docker run --rm \
  --mount source=docker-test_mongodb,target=/data/db \
  -v $(pwd):/backup \
  busybox \
  tar -czvf /backup/docker-test_mongodb.tar.gz /data/db
/data/db here is the path that is mounted inside the docker container for the volume.
You should see a backup file created with docker-test_mongodb.tar.gz as the file name.
Reset Docker
As I will be performing the restore process on the same machine, I should delete both the container and the volume.
docker rm -v mongo-express
docker rm -v mongo
docker volume rm docker-test_mongodb
Restore Backup
I will proceed to recreate the containers, and we can confirm that the volume has been deleted by checking the databases on Mongo Express.

Now we can run the below command to restore the backup.
docker run --rm \
--mount source=docker-test_mongodb,target=/data/db \
-v $(pwd):/backup \
busybox \
tar -xzvf /backup/docker-test_mongodb.tar.gz -C /
Go to Mongo Express and refresh the page.

You will now be able to see that the database which we previously created has been successfully restored.
Conclusion
Taking backups and restoring volumes in Docker can be a complex and error-prone process. However, with the right approach, it's possible to ensure that your critical data is safe and recoverable in the event of a disaster. By following the steps outlined in this article, you can take backups of your volumes with ease and restore them when necessary.

